Bullet Shatter V1.0
This setup guide from www.3dnames.co will guide you through how you can create the following Bullet Shatter using our Blender file.
We have designed this download file to be used by anyone, and you do not have to have any knowledge of using Blender as long as you follow this step by step guide.
We have made this guide interactive, with checkboxes to tick off at each step, so you can keep track of your progress.
Happy Animating!
👆 Sped up demonstration of this text effect!
Video Previews
Create these animations with any text you like using our Blender file and this guide!
Need help? Chat to us on our Discord Channel
Join our DiscordYou will need Blender Installed...
Please make sure you have Blender v4.0.1 installed on your computer, you can download it for free from https://www.blender.org/download/releases/4-0/ - this file was made using Blender v4.0.1
Interactive Guide - toggle the switch on each step to mark it as completed!
Steps quick overview
1. Open Blender File
Mark as completedDownload the ZIP file, extract it somewhere and open up the BulletShatterV1.0.blend file in Blender, we recommend using Blender V4.0.1 or higher.
2. Launch the 3D Names Panel
Mark as completedWhen you open the file - all you need to do is press the small play icon ▷ at the top as per the screenshot below - then in the 3D Viewport there will be a new Panel called "3D Names" - this panel contains everything we need for the bullet shatter effect to work.
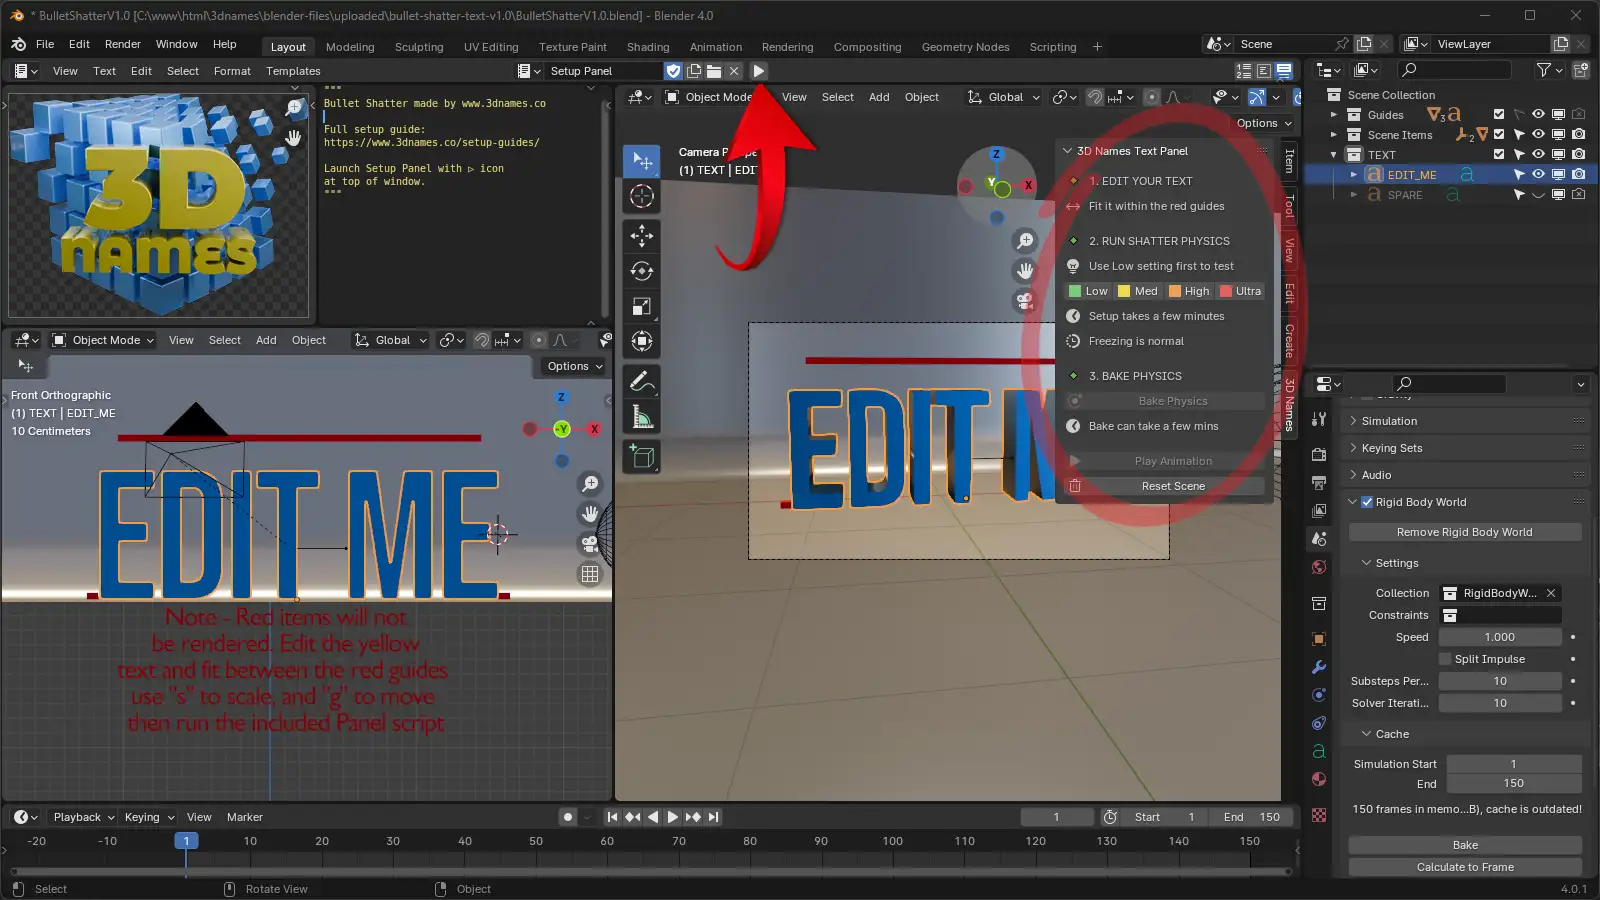
1. Press the Play icon at the top. The new panel will appear on the right hand side
3. Edit Text
Mark as completedSelect the Text object that says "Edit Me" and press the "TAB" key on your keyboard to enter edit mode. You can now edit the text to whatever you like. To exit text edit mode, press the "TAB" key once more
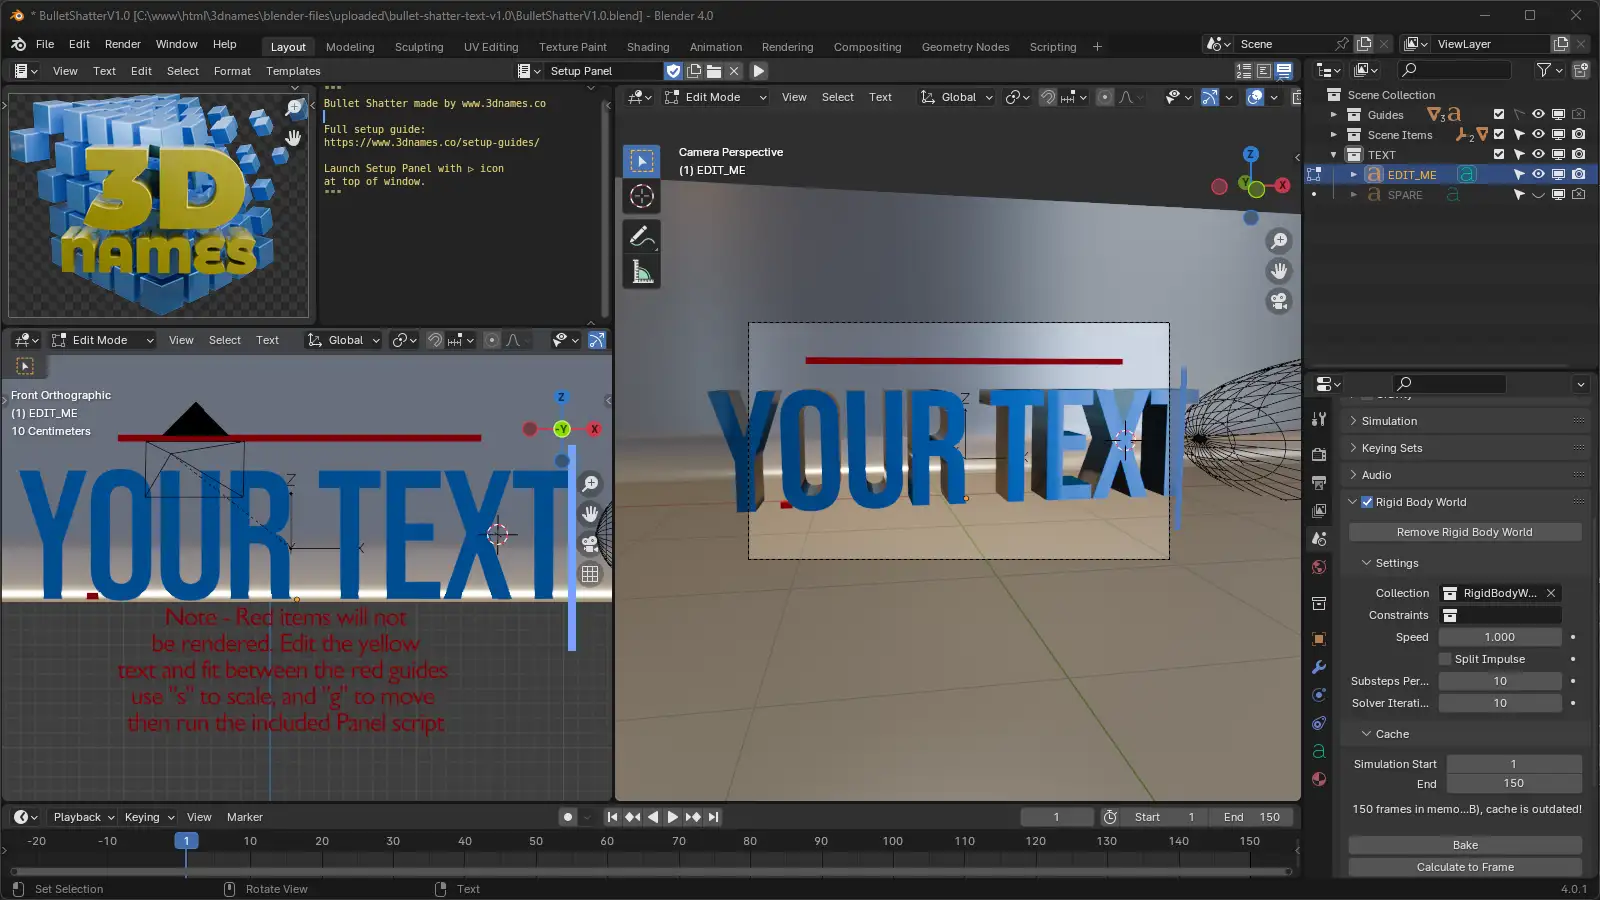
4. Position/Resize Text
Mark as completedMove the text using "G" key to grab, and then move it around, or "S" key to scale it! Make sure it fits within the red guides on the left, right, and the bottom
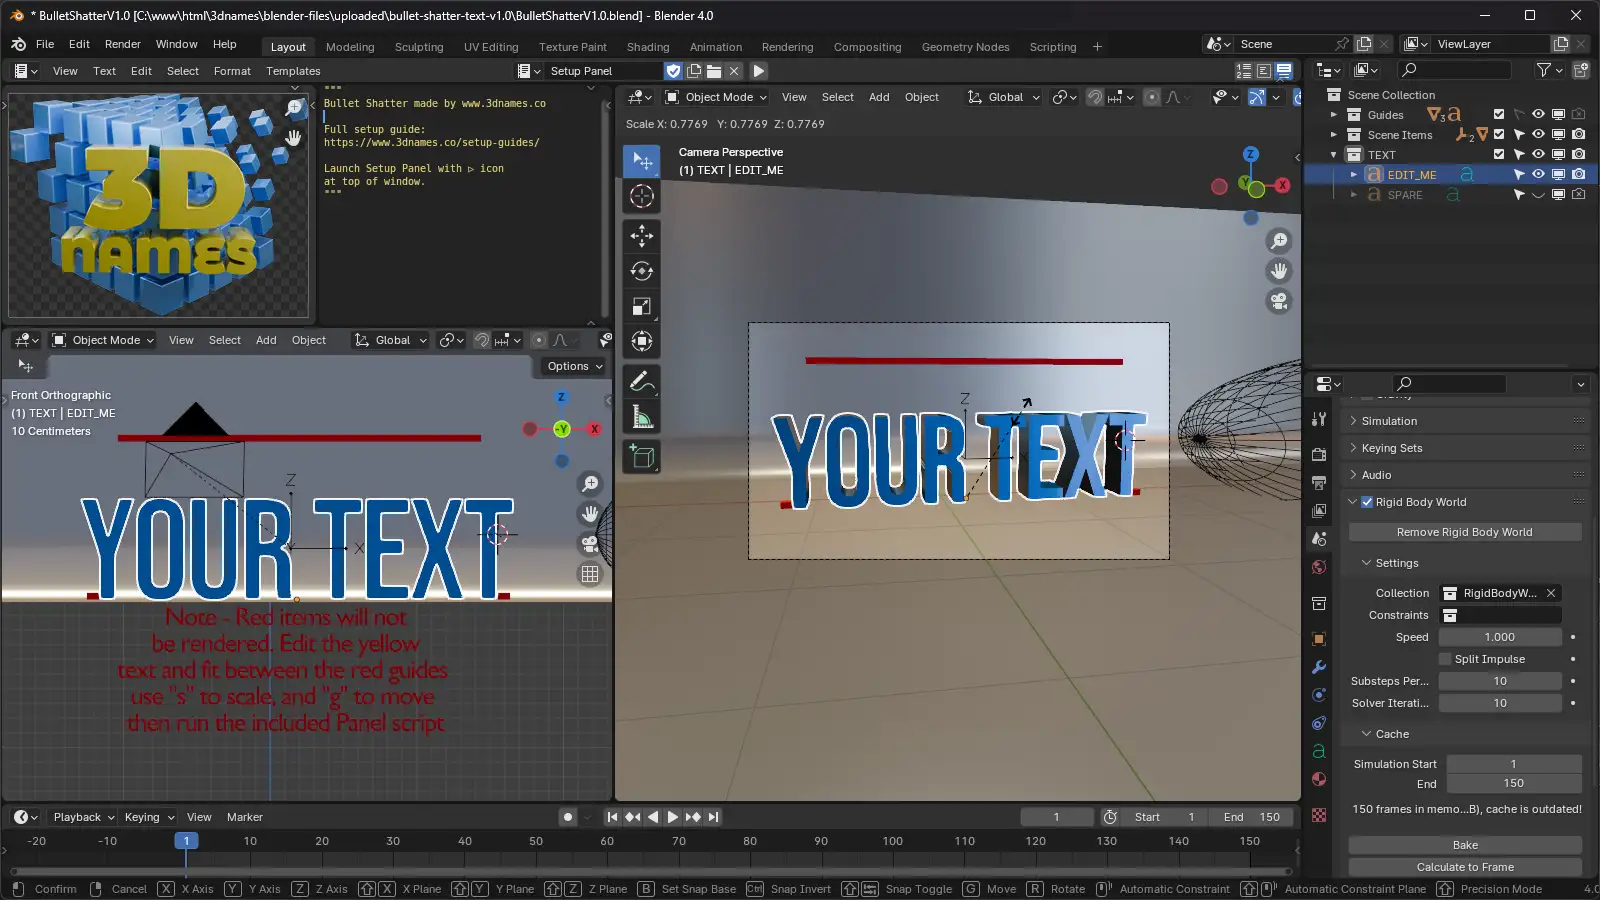
5. Running the Setup Buttons
Mark as completedOnce you have your text in place - you can now press the "Low" button, this will then run the script that will break up your text ready for the bullet shatter (The other buttons break the text up into smaller chunks and will look better but will take longer to run so we recommend using the "Low" button to start with)
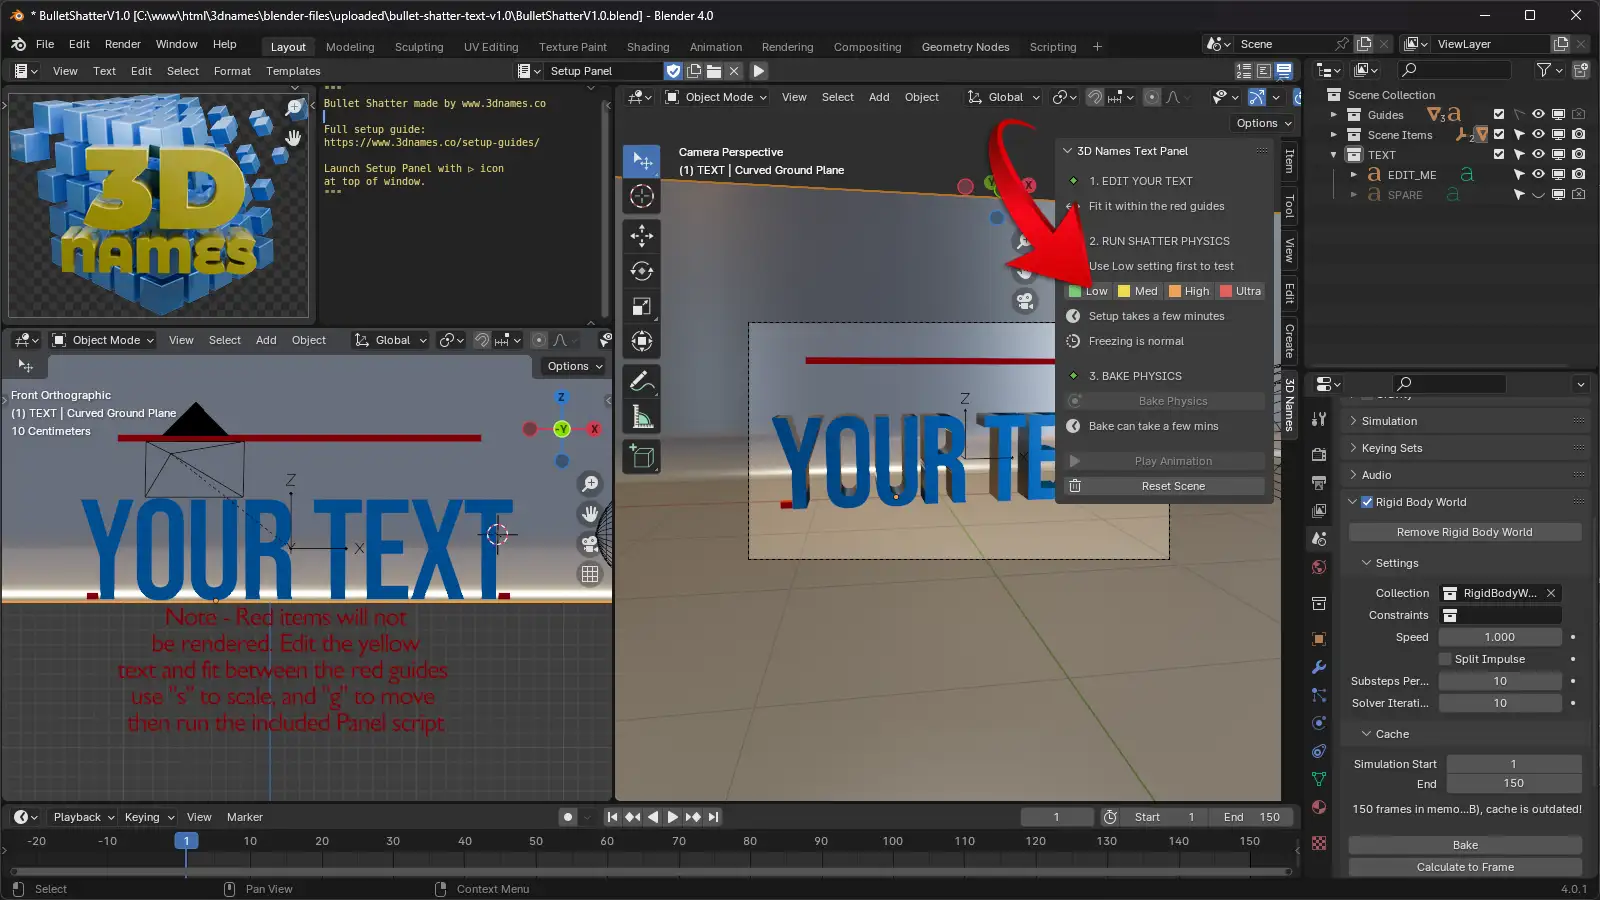
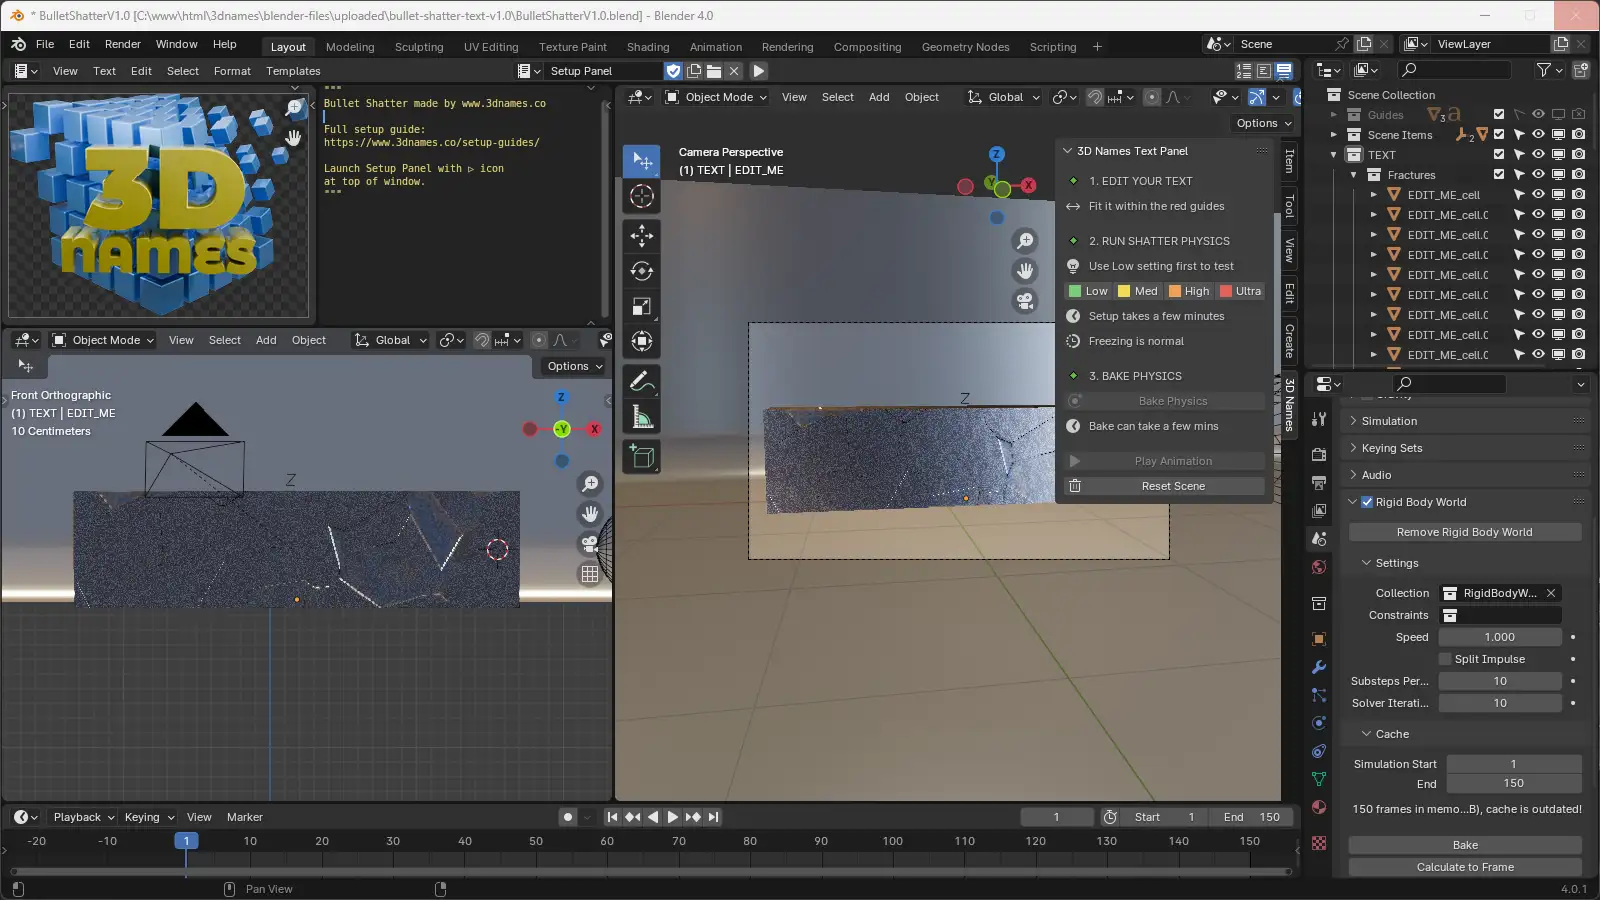
It can take a few minutes to complete - you will see a larger box over the top of your text as it's breaking it up into pieces, or Blender may even freeze while its working on it... this is normal and just go make a cup of coffee!
6. Bake the Physics
Mark as completedNow press the "Bake Physics" button - this will cache the animation data into the scene. This can take a few minutes to complete, and freezing is normal while it's working on it.
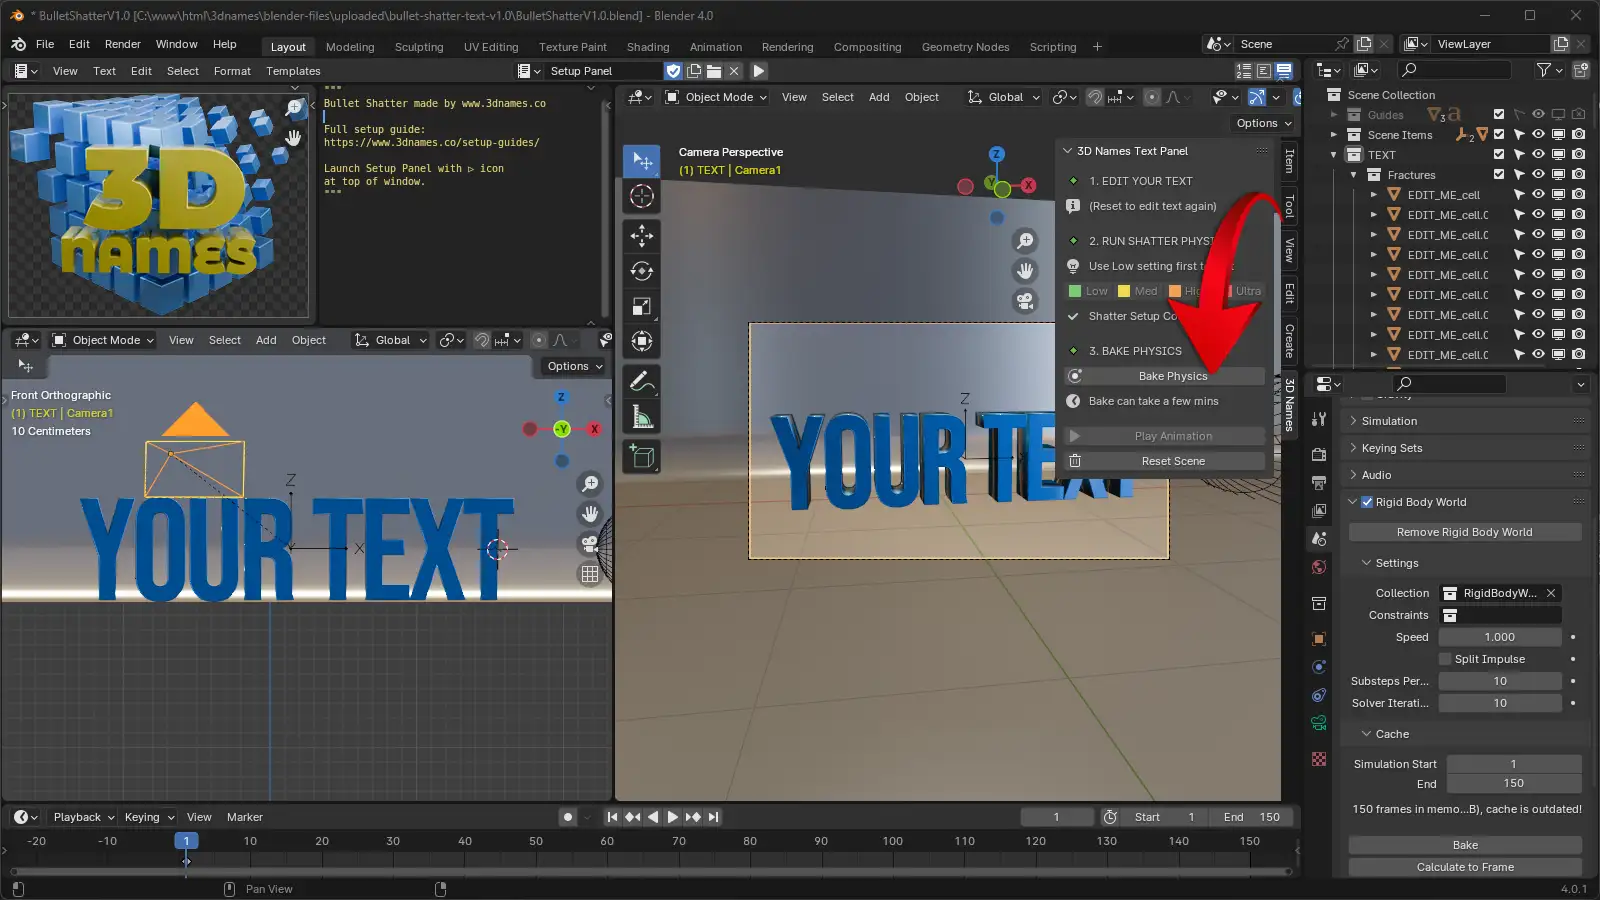
7. Play the animation
Mark as completedOnce the simulation is complete you can play the animation to see your text being shattered, be aware that using the higher shatter setups this may feel pretty slow to scroll through for slower computers, but should give you an idea of how it will look in the final render
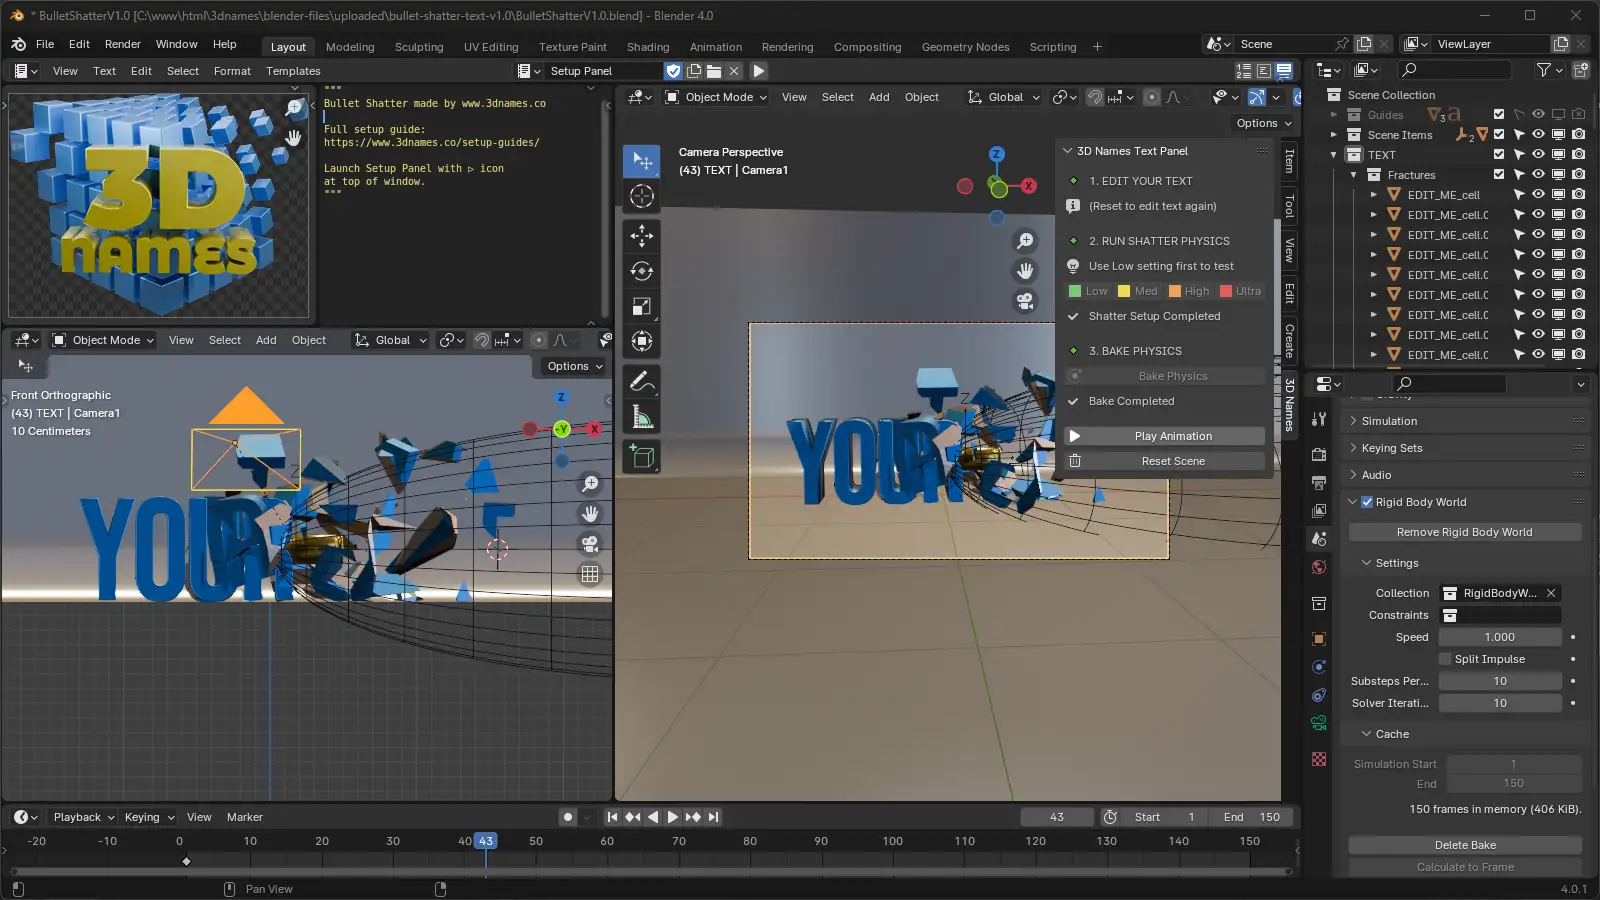
8. Now Render the animation
Mark as completedIf you'd like to render a still frame simply press the "F12" key on your keyboard, or if you'd like to render the animation, press the "Ctrl + F12" keys on your keyboard (or "CMD + F12" on Mac) - the rendered frames will be saved in the ./renders folder.
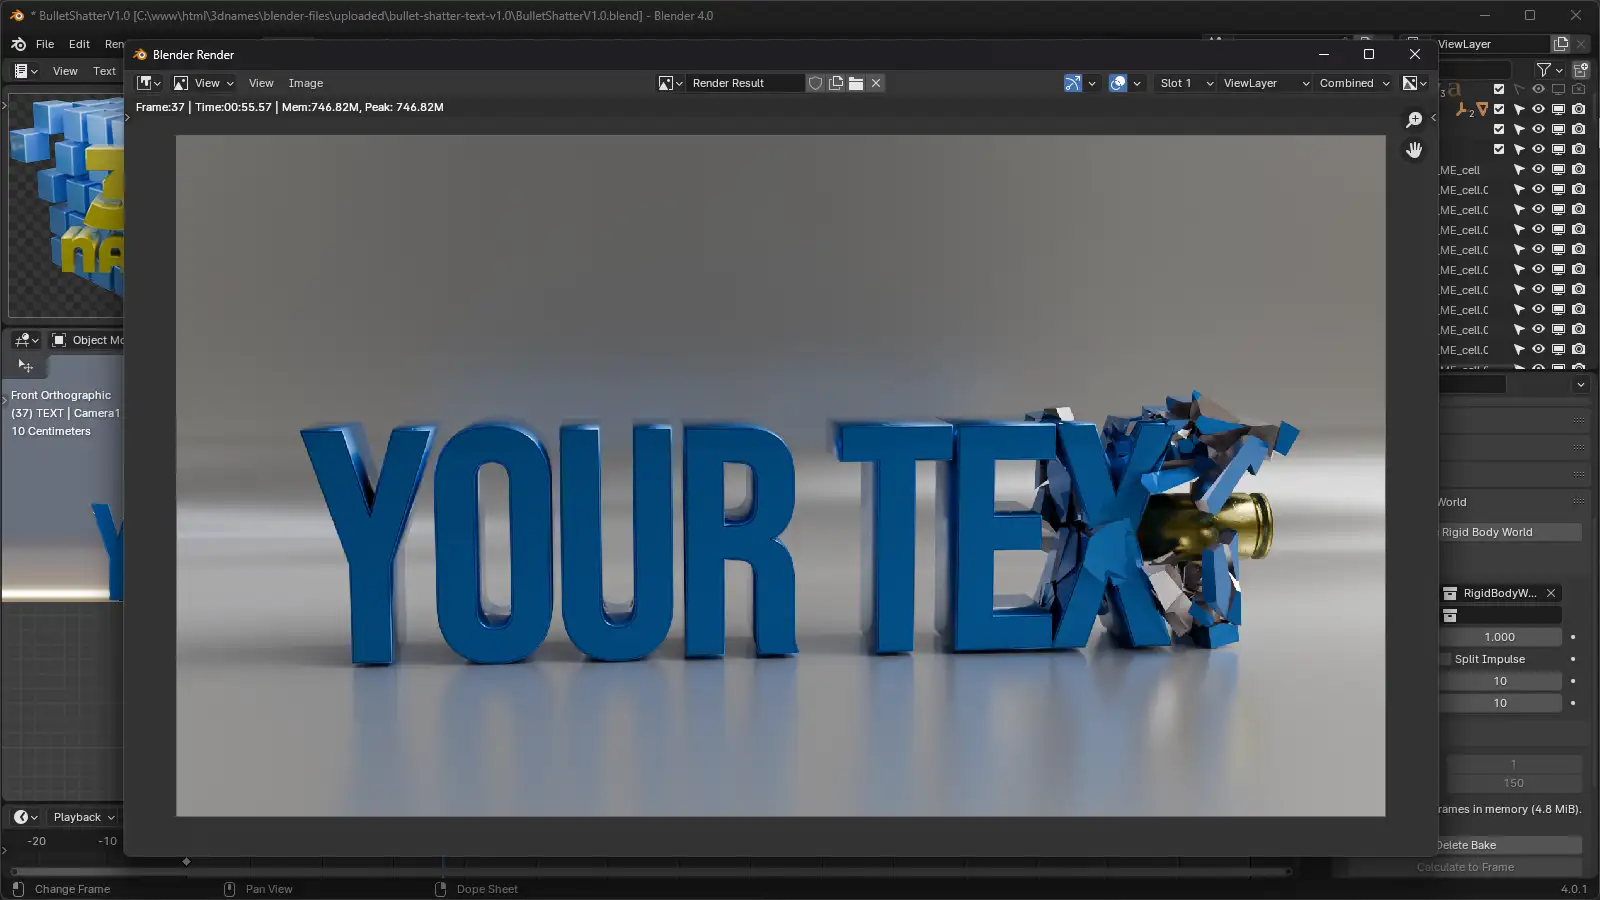
Turn your PNG frames into a Video
To turn your rendered PNG frames into a video, please take a look at the following Video Render Tool guide

