Create your own Customized 3D Video
This blog article explains how you can start creating your own 3D video to show off your name, message or company logo in this cool Music opener video

Before we start
In this tutorial we are going to use 2 bit's of software. The first is Adobe After Effects for the video effects, plus a plugin for After Effects called Element 3D which is available via videocopilot.net - you will need both of these in order to be able to edit your own videos.
What we'll be making:
Getting the template file
In this tutorial we are going to make use of an After Effects Template called Headphones Logo - so purchase yourself a copy of this template file, download it and open up one of the project files in After Effects (In my case I opened up the "Headphones_Logo(CC2015-2017).aep" file)
Re-linking files
When you open it up for the first time, and depending on your OS it may ask you to re-link some of the 3D Object files.
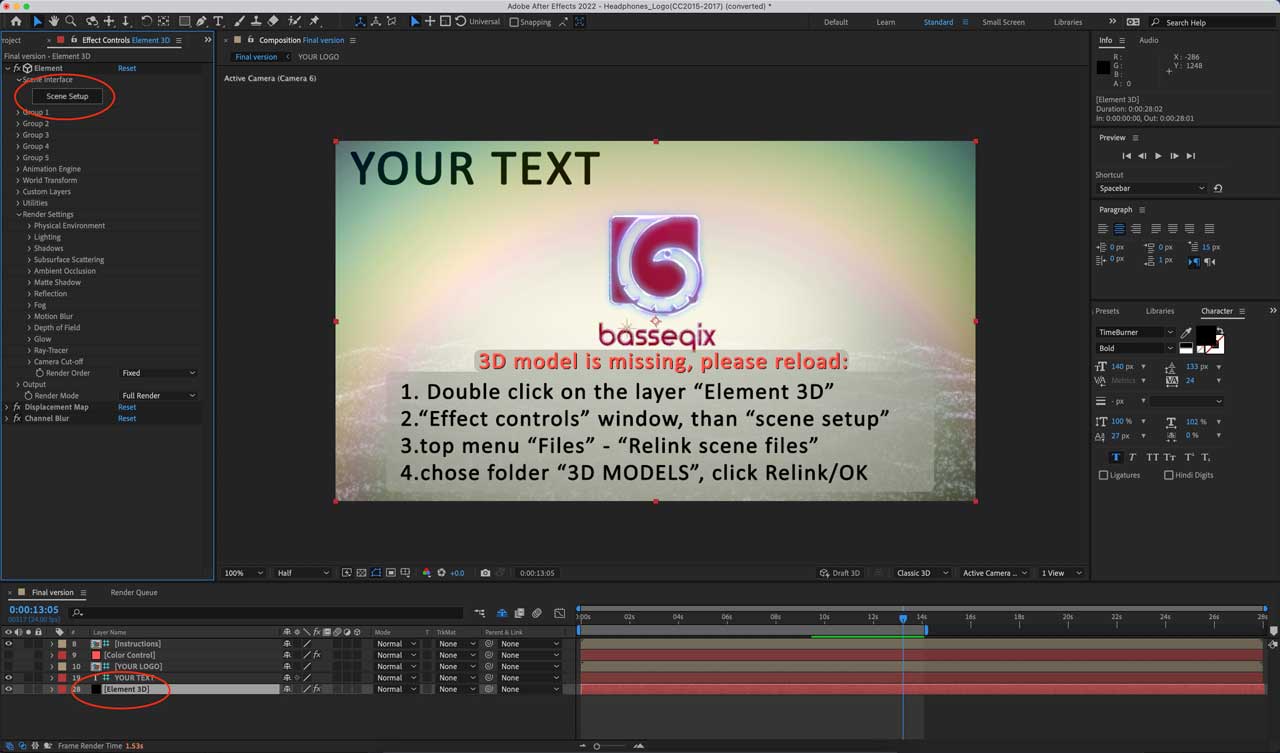
This is because Element 3D needs absolute paths, and if the file was made on a Windows machine or a user specific location then it will need re-mapping to your own location (I'm hoping they fix this very annoying bug in a future update!) - to do this, you need to select the Element 3D Layer, then press the "Scene Setup" button in the Effects and Presets panel - see image above.
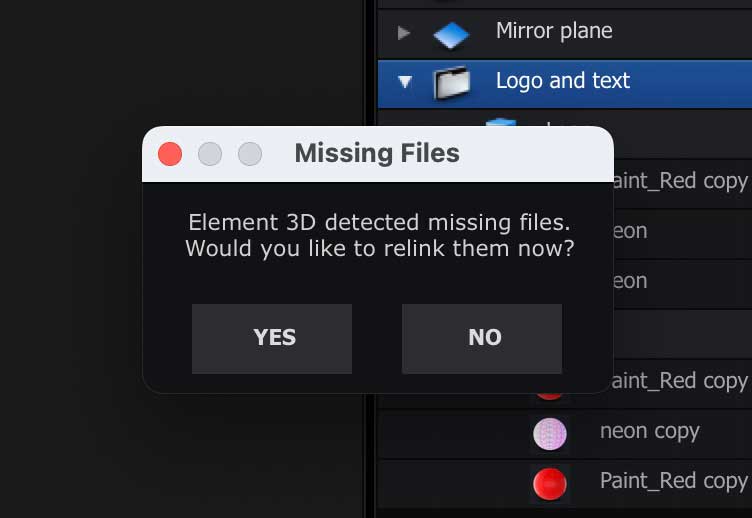
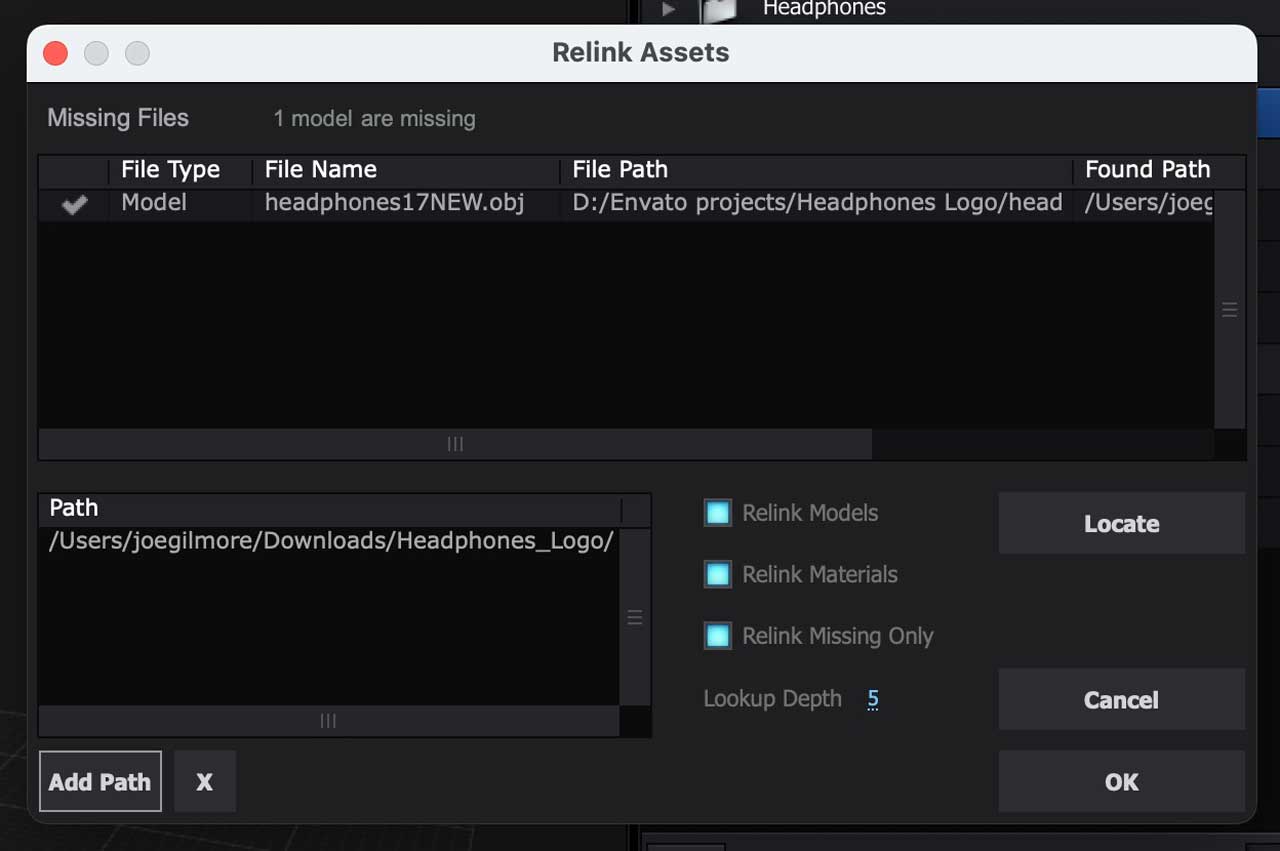
You will either be prompter in which case press Yes, or you will need to navigate within the Element 3D Menu to File --> ReLink Scene Files - this will bring up a panel like below, and from here you need to choose the location of your download template file was unzipped to, and choose the folder "3D_models":
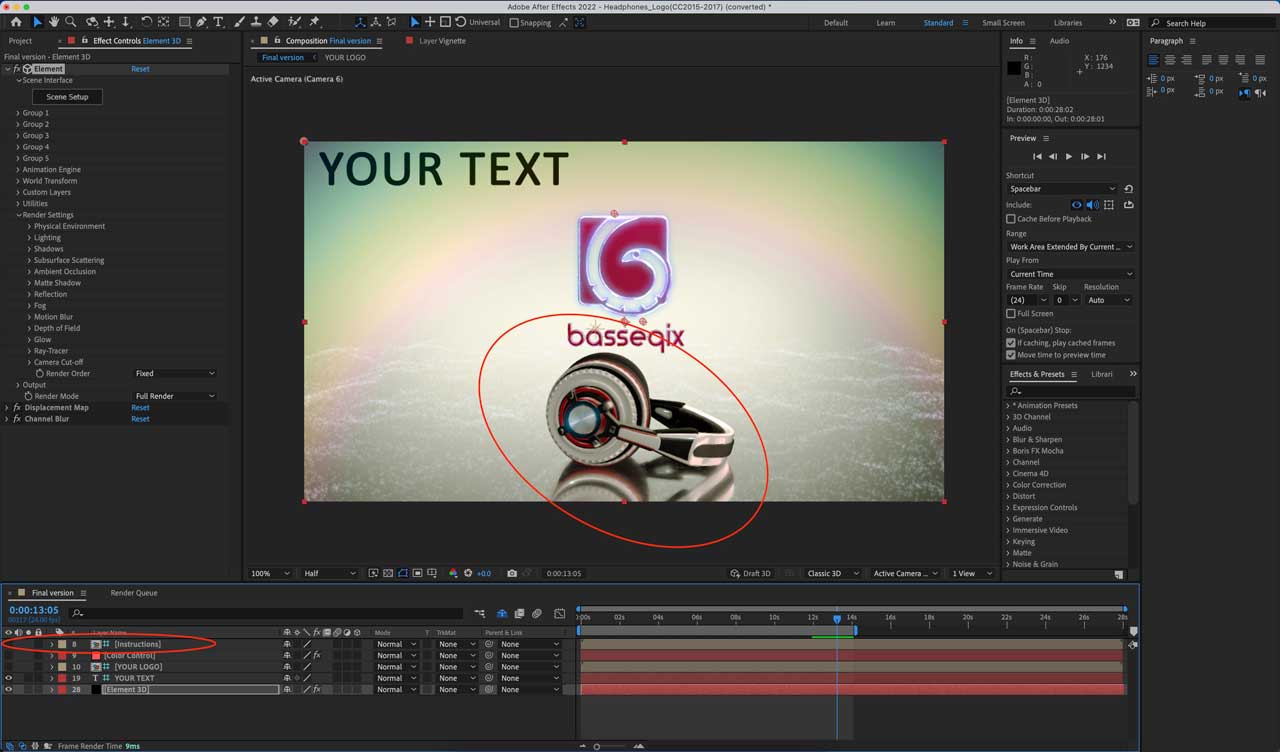
Once you hit ok, and close the element 3D Panel, you should be able to return into After Effects and if you hide the layer called "Instructions" you should now see the Headphones Model has appeared into the scene:
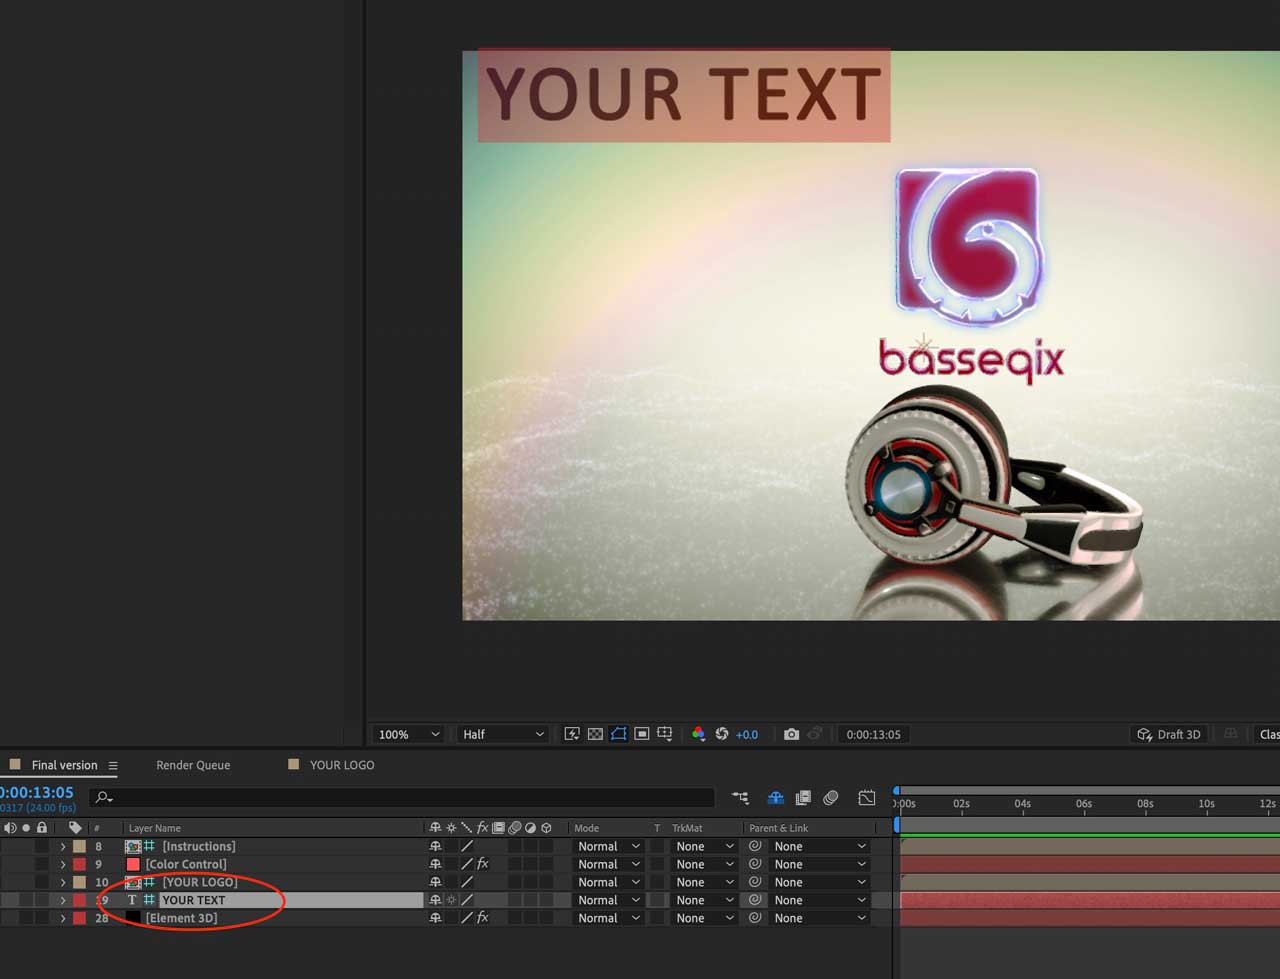
Editing the Text
Now the fun part, lets edit the text and render our video. Find the layer called "YOUR TEXT" and double click it, this will alow you to edit the text at the top left which is a special layer that is hidden from our final render but visible here, this is linked to our 3D Custom Layer, so when we edit it it will update the red 3D Text above the headphones:
Here's my update after adding "Joes Video":

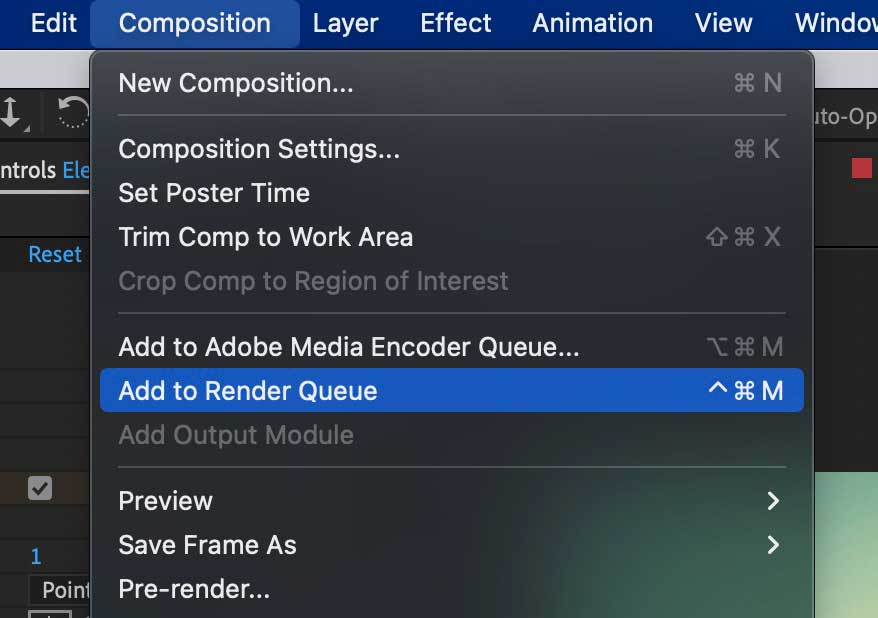
Next lets add the composition to our Render Queue from the top menu:
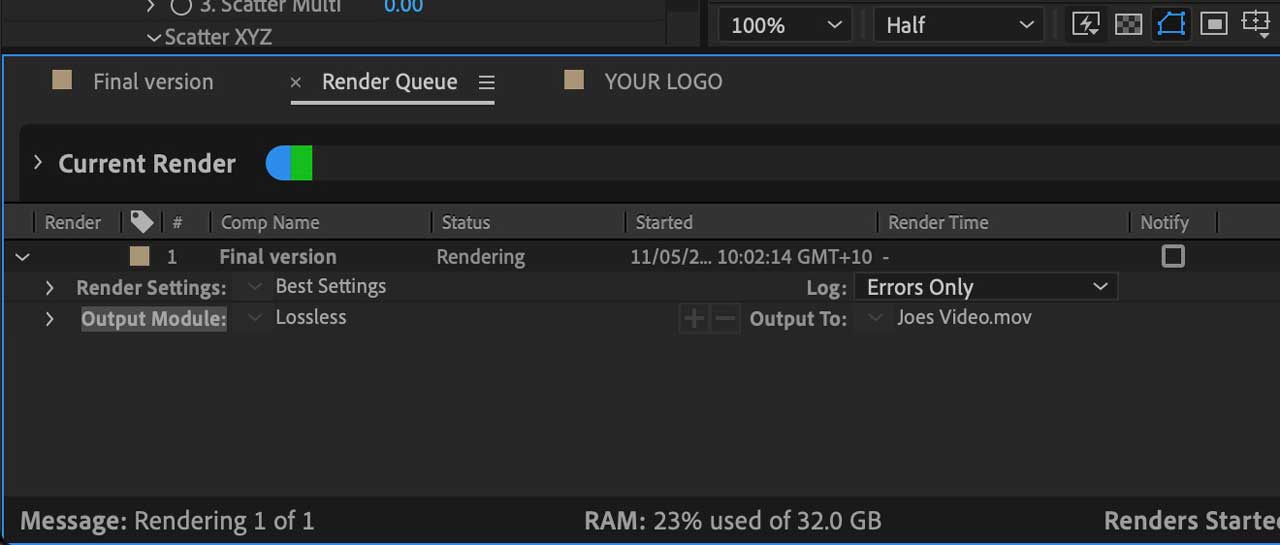
Now, when we press the render button our video will start rendering and create our final output file. Hint: run this through Adobe Media Encoder to compress it after your done!
More Videos:
Take a look at our Videos Section, or Browse the Videohive.com 3D video section for loads more!